The incomplete Atari Portfolio disassembly guide
I don't want to be mean, but you better print this post and keep it by your Portfolio together with a small screwdriver - you know, just in case 😉 It covers only the keyboard part of the case - maybe someday (I hope not) I'll write about dismantling the display.
First, obviously, prepare that small screwdriver I mentioned before and a place where the screws will be safe (a small plate will do the job). And here we go.
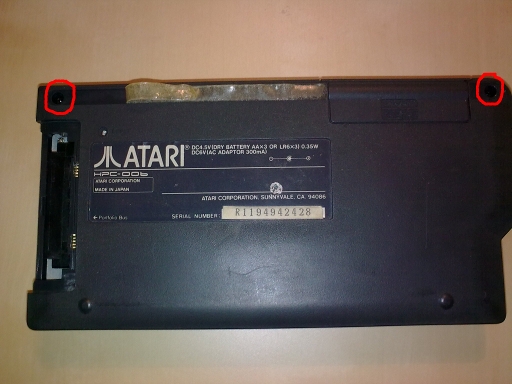
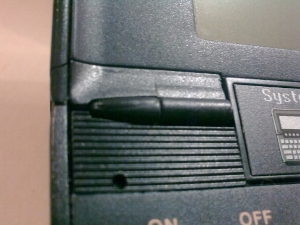
Peel off the rubber feet from the back side of the case. Underneath you'll find two black screws:
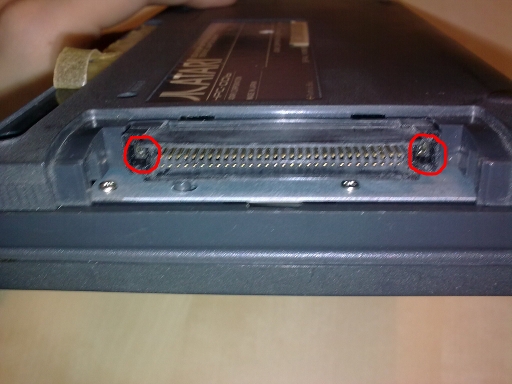
Unscrew them. To open the case you'll also need to unscrew the two remaining black screws, located on the expansion slot:
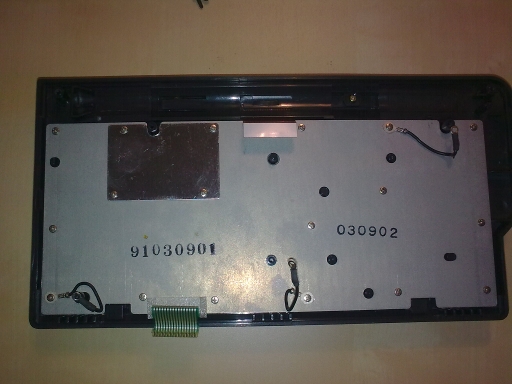
That's it. You may carefully open the case and watch the guts:
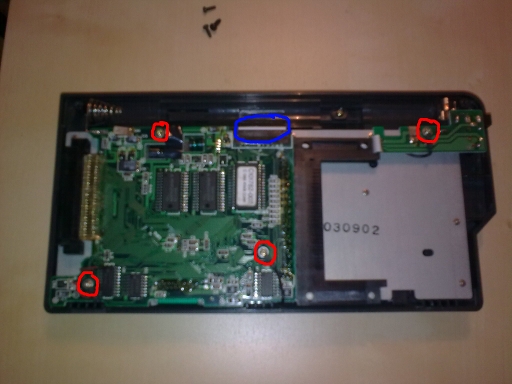
Unscrew the four silver screws (marked red), then detach the display tape (marked blue) - you need to open the brown connector, uncoupling its mobile part with the screwdriver.
The main board is still attached to the keyboard with the green keyboard ribbon cable:
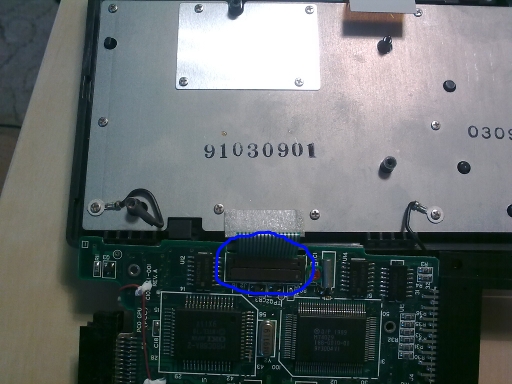
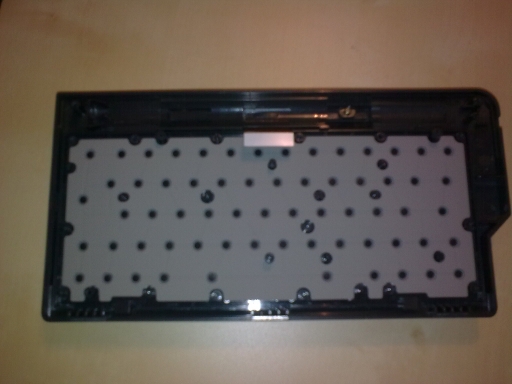
Detach it and put the board aside. Unscrew all the silver screws from the metal shield (also those holding the three black cables and the metal plate):
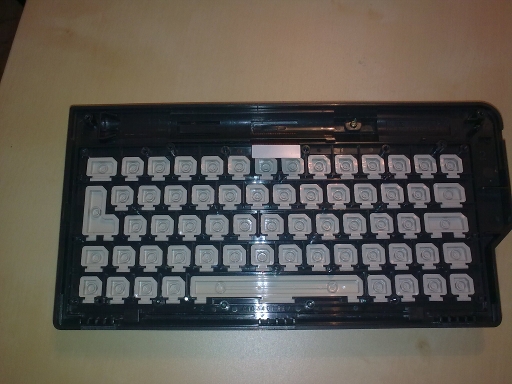
Now remove the shield (it has a keyboard foil underneath) and you get access to the rubber...
...and the keys:
Good luck!
Hinges 2: Psion
This time about healing broken hinges in SIBO Psions. It seems that this happens to be an issue in Psions too.
David MacKay has written an exhaustive and excellently illustrated tutorial on how to repair the hinges. You may find it on his website, where several other useful tips can be found.
Edited 2019/03/23:
It's not always a spring that breaks, sometimes (due to continuous strain?) you get a crack on one of the sides of the button bar - and it's a good news as it's much easier to fix. You can read a brief repair guide here.
(Note: instead of a piece of ABS as the author suggests, I used a paper staple bent to make a square frame - I'm not sure if it's better, but it seems to be doing its job.)
HP LX’s hinges
Recently, I had a conversation with Chris S, a vintage stuff collector who told me that he'd never had an HP LX because of the (in)famous problems with hinges. To calm his worries, I promised to come with a link to a great source of all-things-HPLX knowledge. Here it is: an article about how to repair broken hinges, latches, displays and keyboards, and how to prevent future hinge problems - at Hermocom.
Update <2013.07.11>:
MCbx (see comments to this post) has just sent me a link to his updated page about HP 200LX. Lots of useful tips, programs and links to resources over the Web. Here it is:
http://computers.mcbx.netne.net/portables/200lx/index.htm
Vintage palmtop and a Linux PC
I announced a text about games, but meanwhile another idea came to my mind. Surfing the Web I encountered many questions about uploading files to a vintage palmtop, asked by the fresh owners of Portfolios, HP's etc. While it's fairly easy to do in Windows - just launch HyperTerminal, set up the connection and click "send" icon, remembering to choose a proper protocol (XMODEM usually) - I've never seen any tips about doing it with Linux.
I know two ways to send/receive files to/from a palmtop with an RS-232 port (I use it with HP 95LX and NC 100, but it would work with Portfolio). This time nothing about Psion (hint: try plptools).
1. The easy way
Install minicom (full-screen but text-based) or cutecom (with GUI). Remember to set correct connection parameters (56700 baud would be ok for an HP, but only 9600 for an NC 100). With minicom it goes like this:
minicom -b 57600 -D /dev/ttyS0
for 57600 baud at the first serial port. Important notice: nowadays computers (laptops especially) lack an RS-232 port. In this case an RS-232<->USB converter comes in handy. Mine is a cheap, Chinese no-name and it works well with my Ubuntu. When using such converter, your device is /dev/ttyUSBx (where x is a digit, usually 0). For diagnostics you may run dmesg | tail and check the name of the device (if any appears).
If you want to use cutecom, just run the program and set the desired parameters in the main window.
On your palmtop, set the configuration (on 95LX you only need to set the proper baud rate, leaving everything else unchanged; on an NC the defaults are just fine, just press Function-S to enter the terminal program). After connecting, choose the file to be sent from the PC. Now you need to set up the palmtop to receive the file. On an HP it's straightforward, just choose it from the menu. On an NC press Function-L to invoke the file list, then press Menu and T (Transfer). Choose the name under which the file will be saved on your computer. Remember to choose XMODEM as the protocol.
Sending files from the palmtop to the PC is obvious.
2. The way of the warrior
Here we'll use the palmtop as a Linux terminal. No need to install any communication software on the PC, but the package called lrzsz will be required. It provides, among others, two programs: sx and rx for sending and receiving files, respectively.
First, run getty on your Linux machine:
getty 57600 /dev/ttyS0
Configure your palmtop as described above. On an HP 95LX you would want to set the terminal type to ANSI and turn wrapping on, but that's not necessary. After establishing the connection you will see the Linux login message prompting for password. Log in to your account (notice: serial connections are slow, so be patient). From the command line type sx filename to send a file from the PC to the palmtop. Set up the palmtop to receive files as described above. If you want to transfer files to the PC, use rx.
Log out and close the connection.
RAM expansion for Atari Portfolio
UPDATE [2020/04/12]:
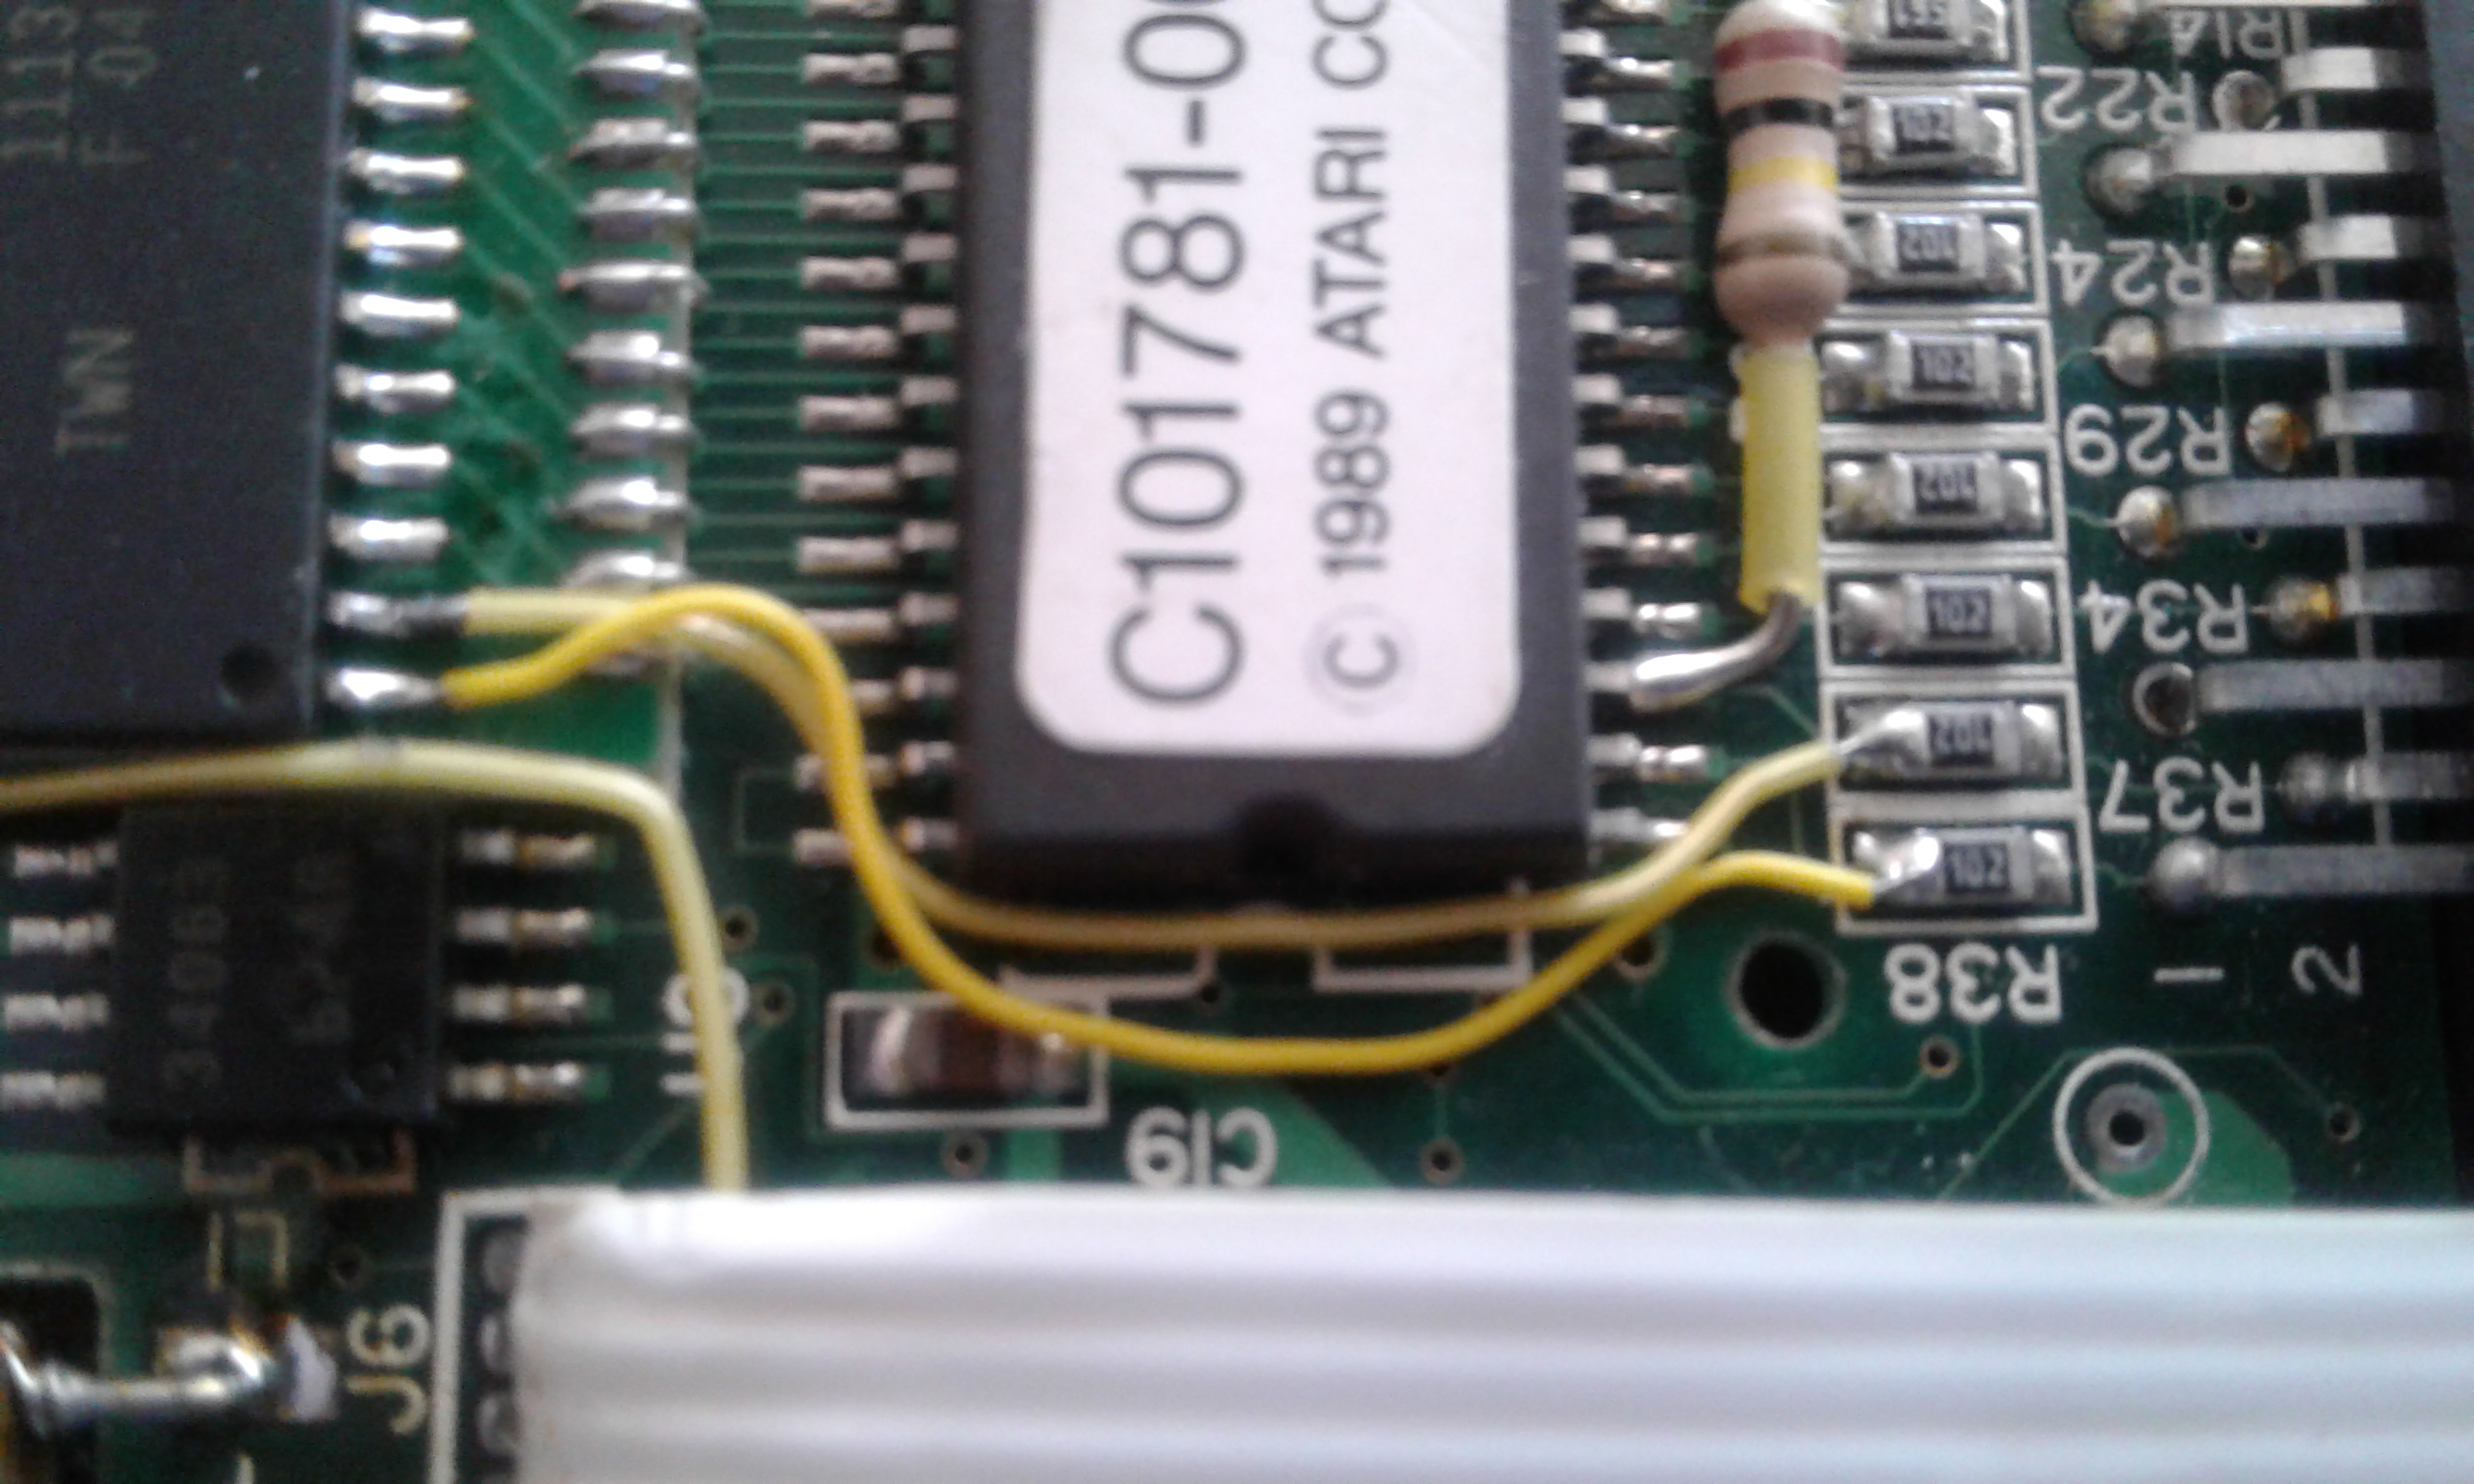
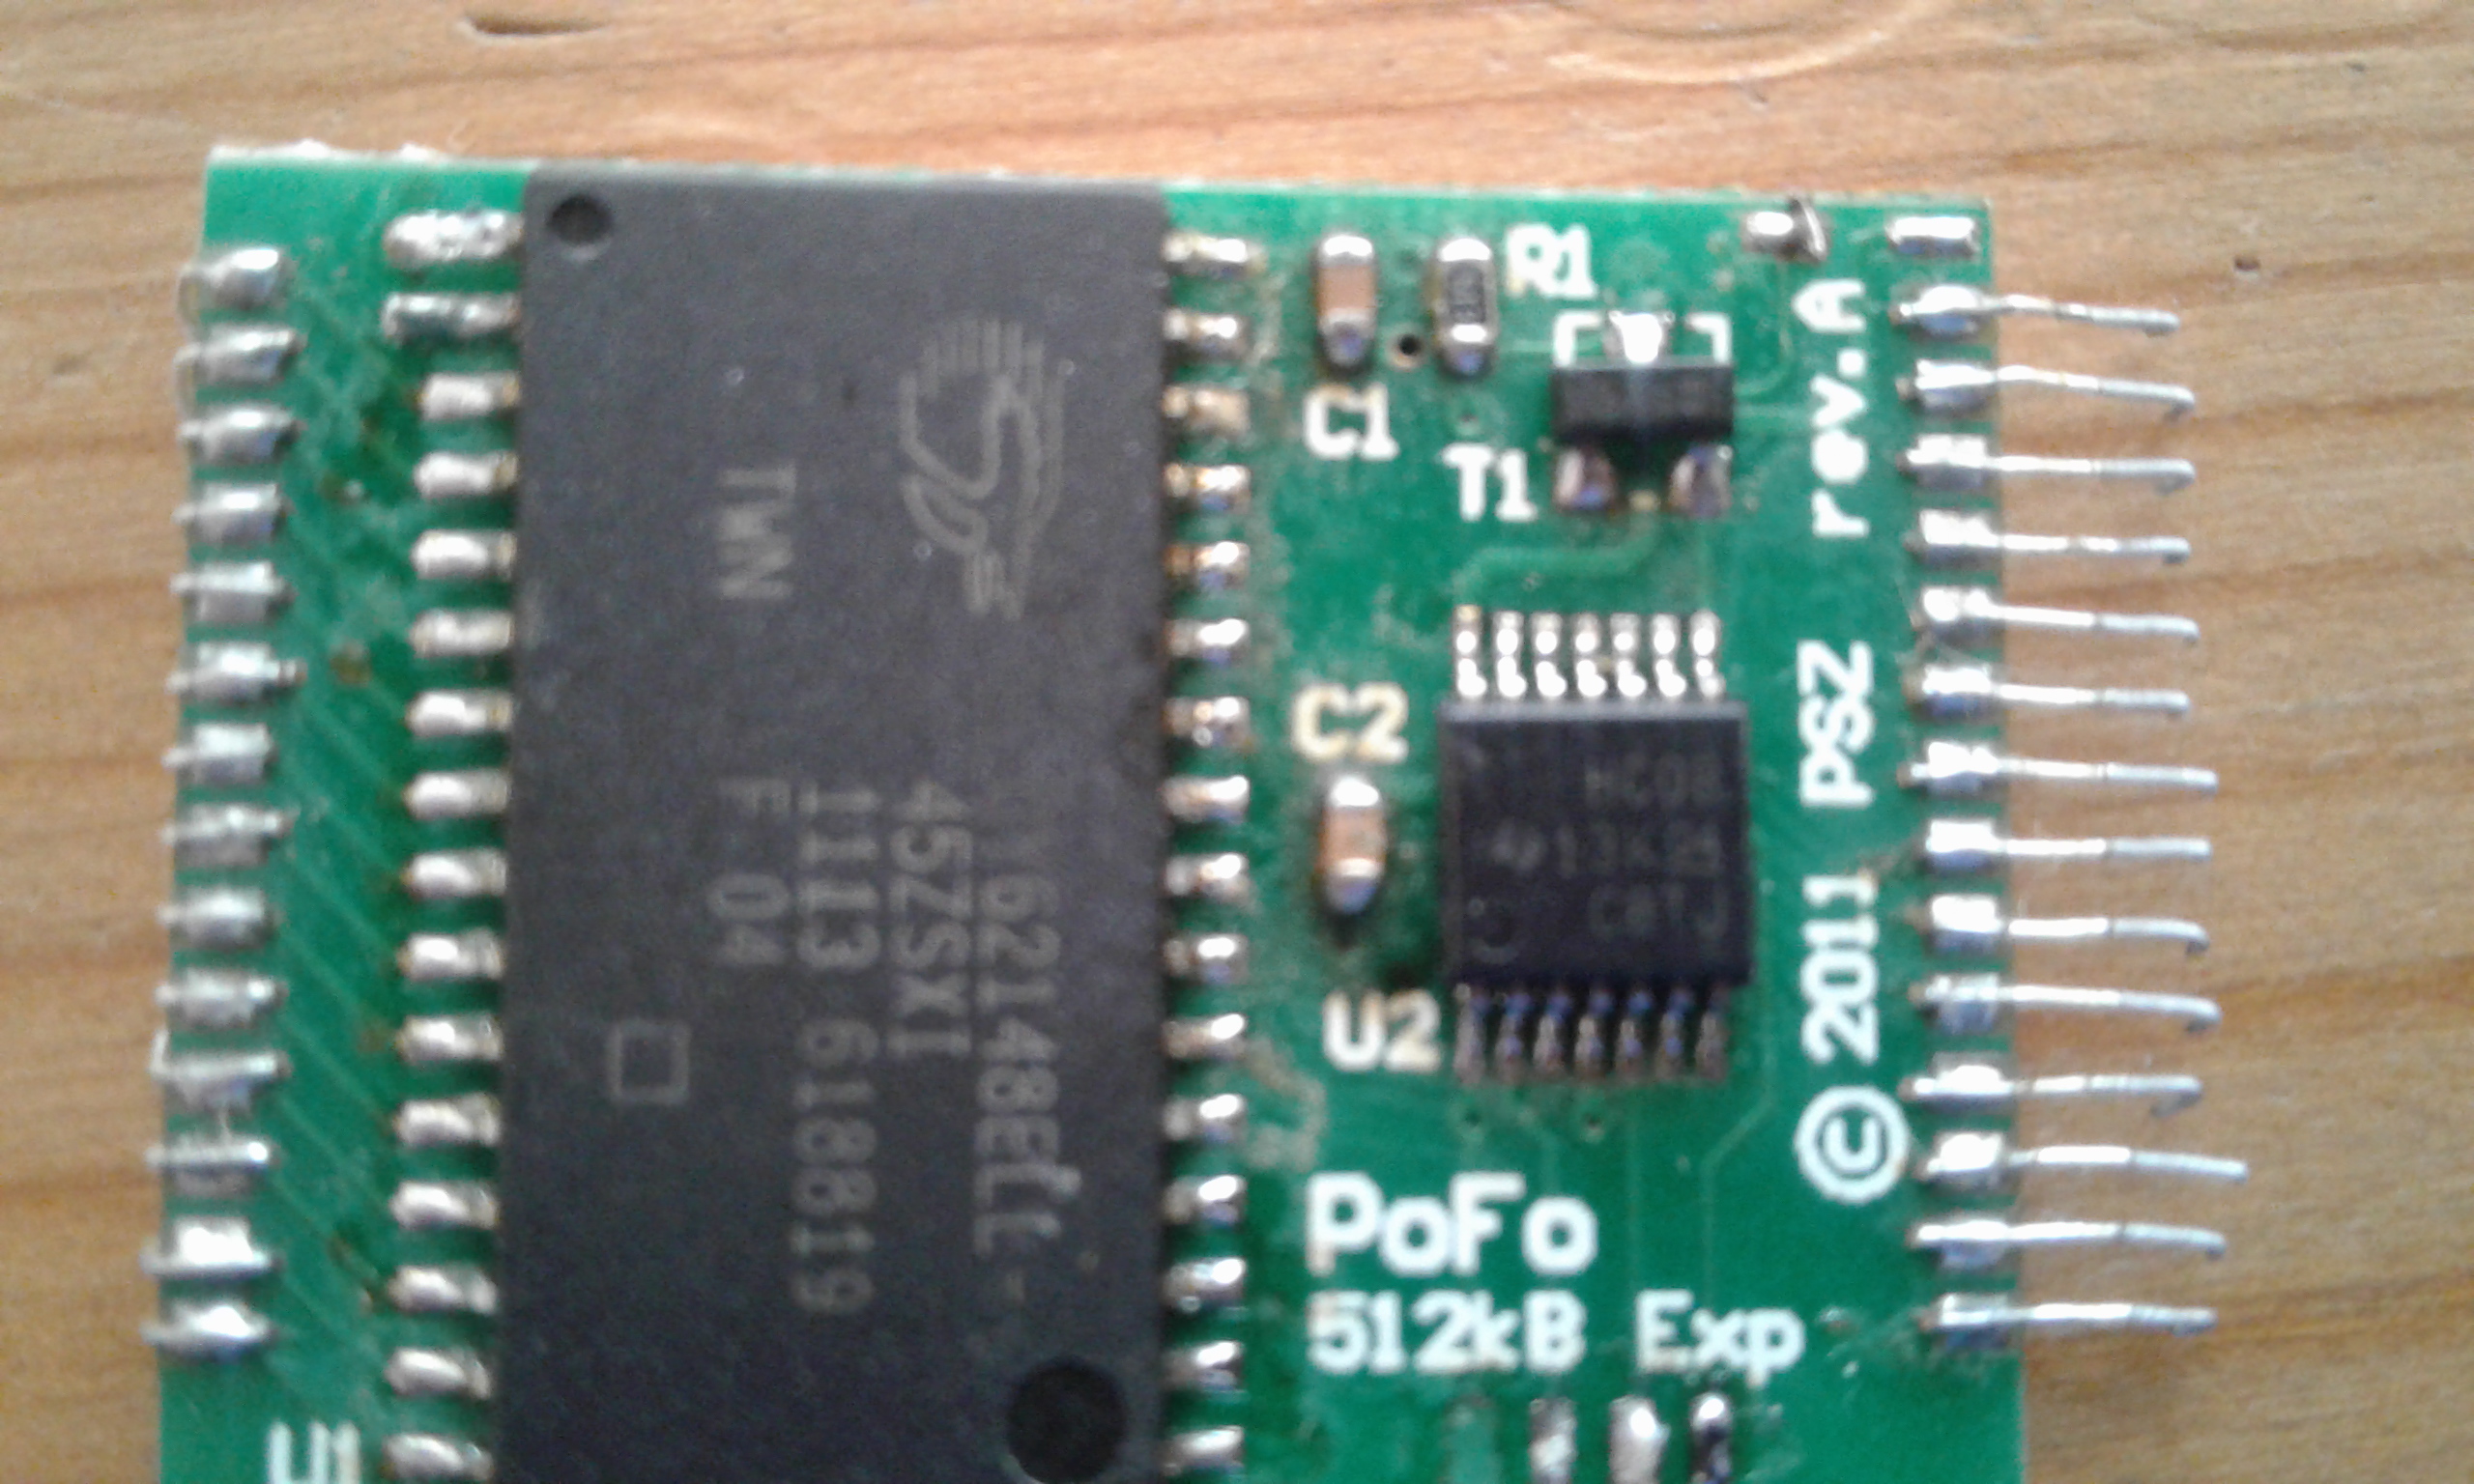
By popular demand, I decided to take more detailed photos of the expansion board and post them here. The author is (apparently) unreachable, and I don't have any schematics or technical knowledge of the circuit, so please, don't ask me about it. I won't be able to help.
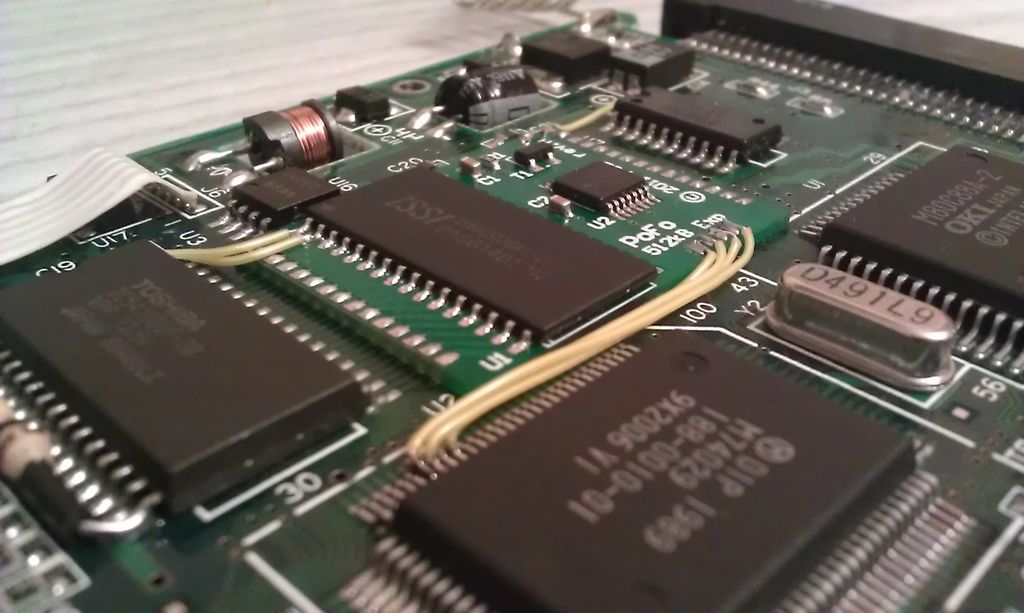
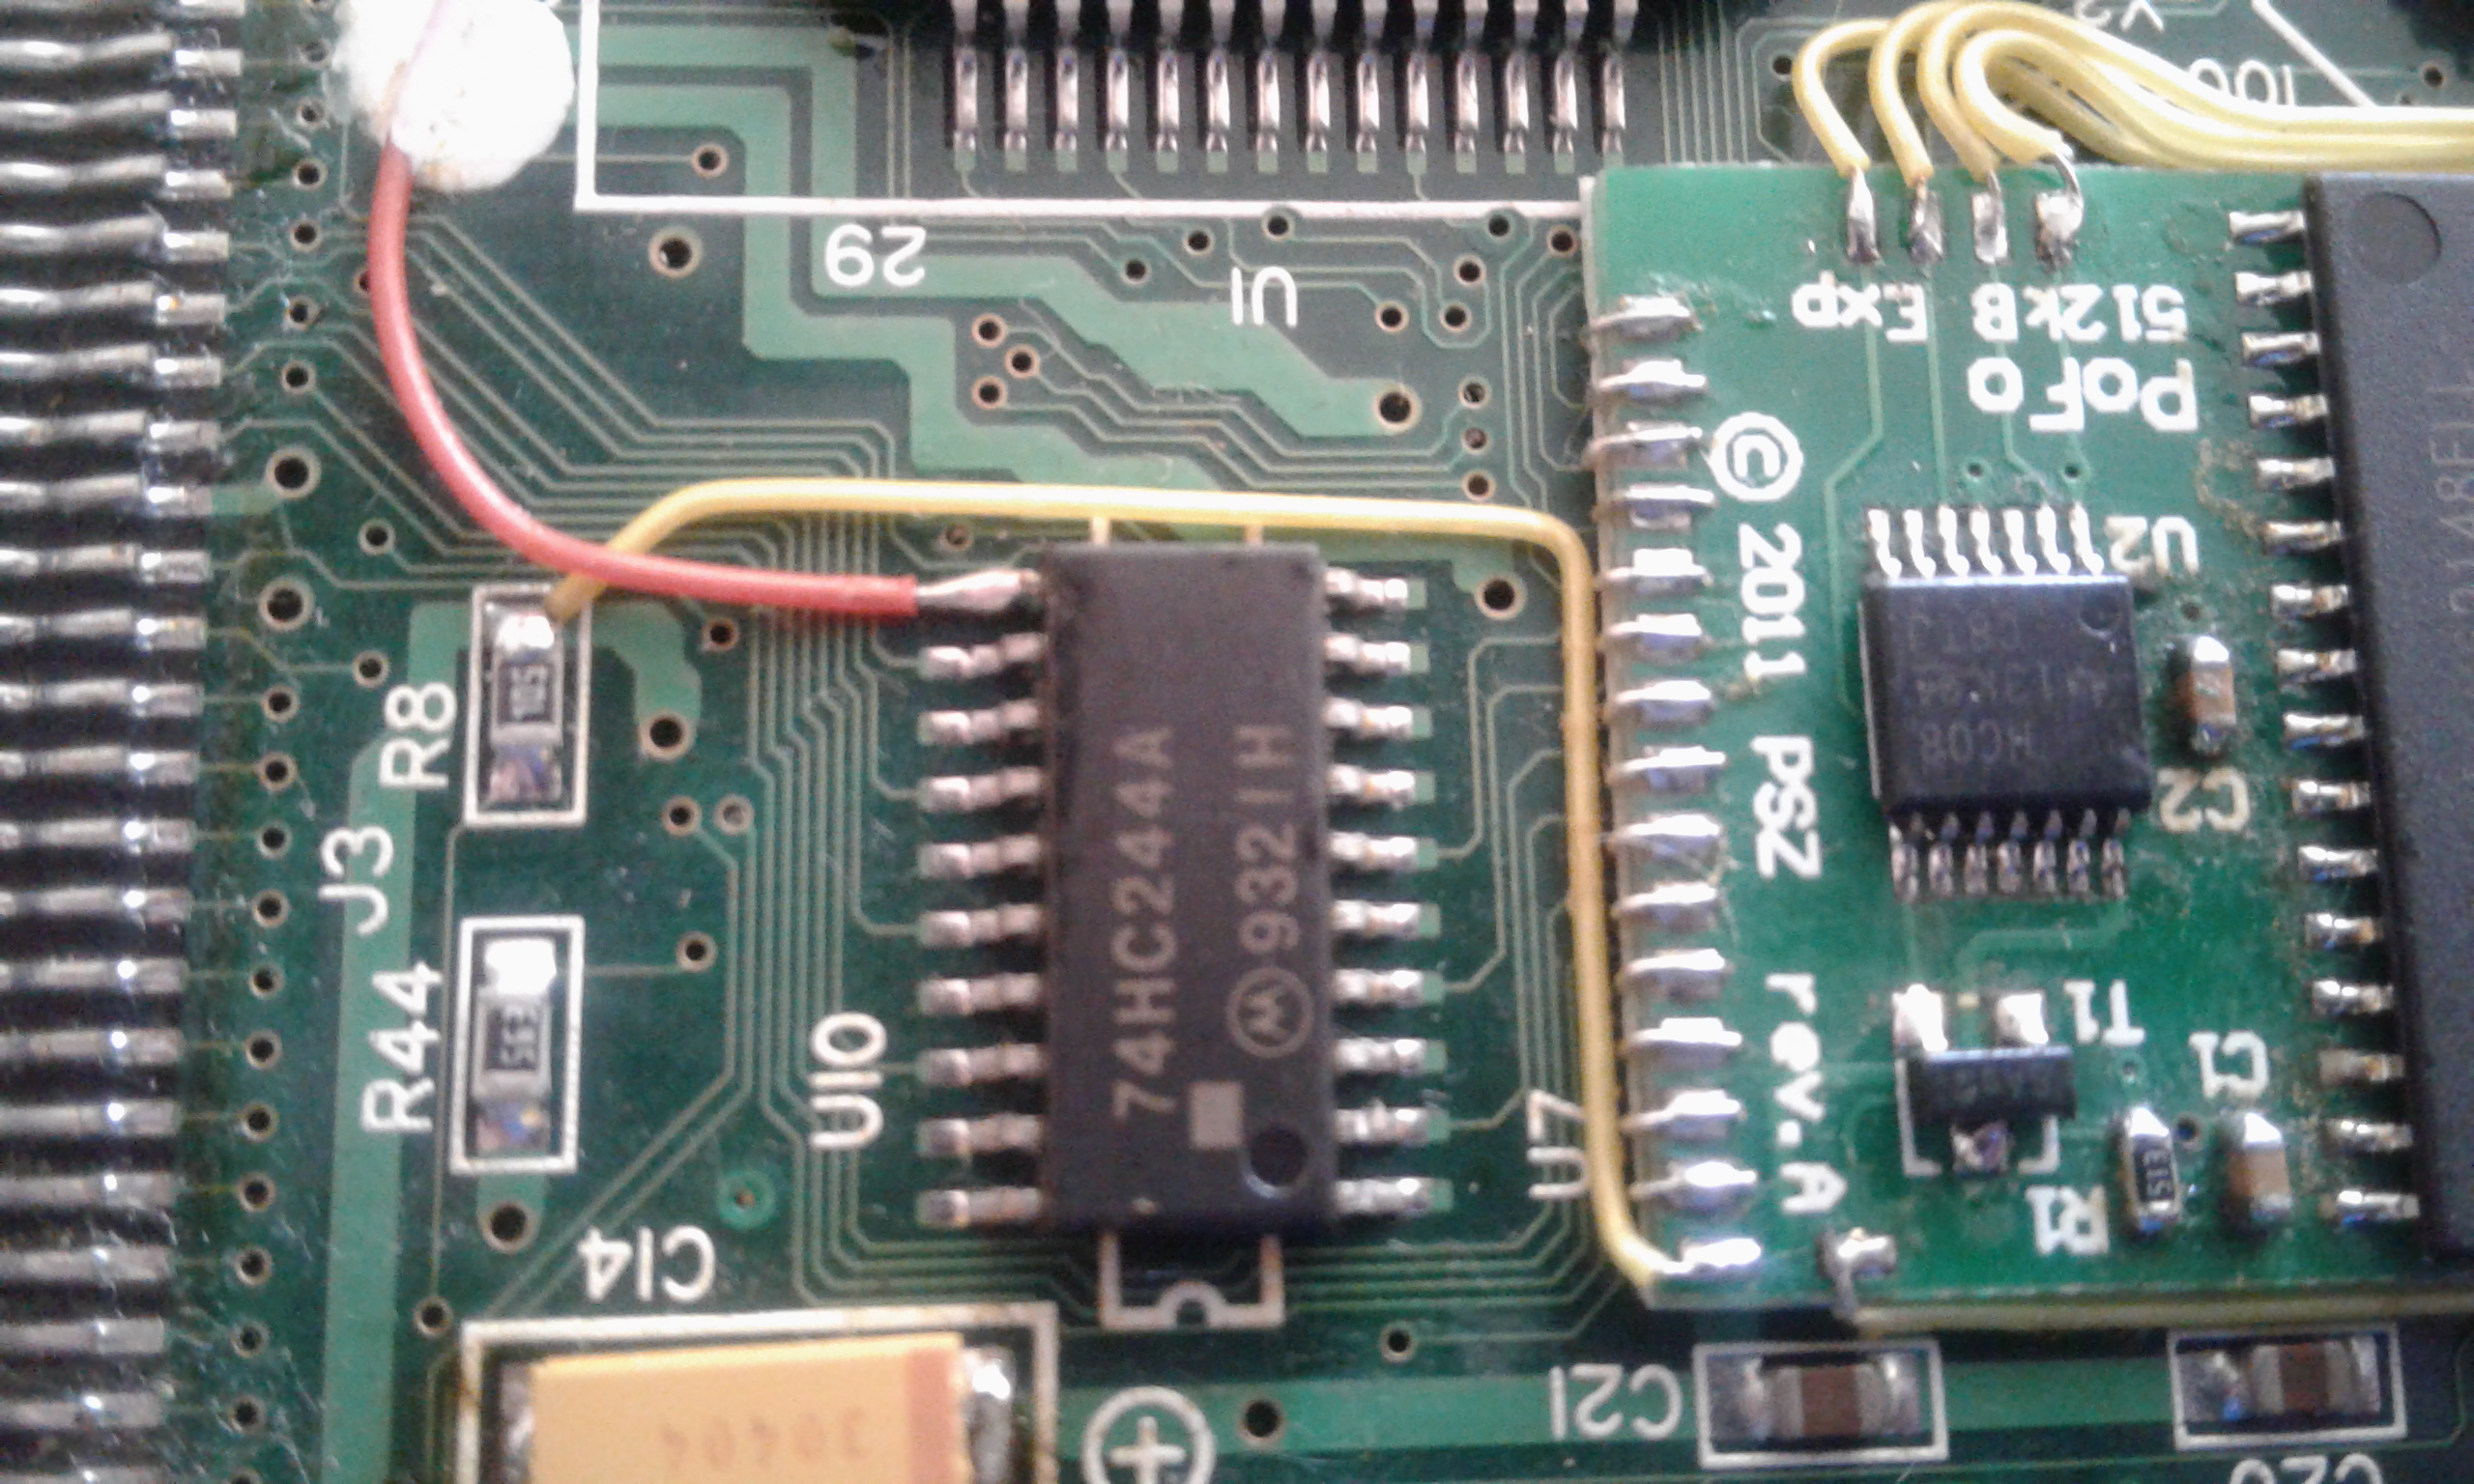
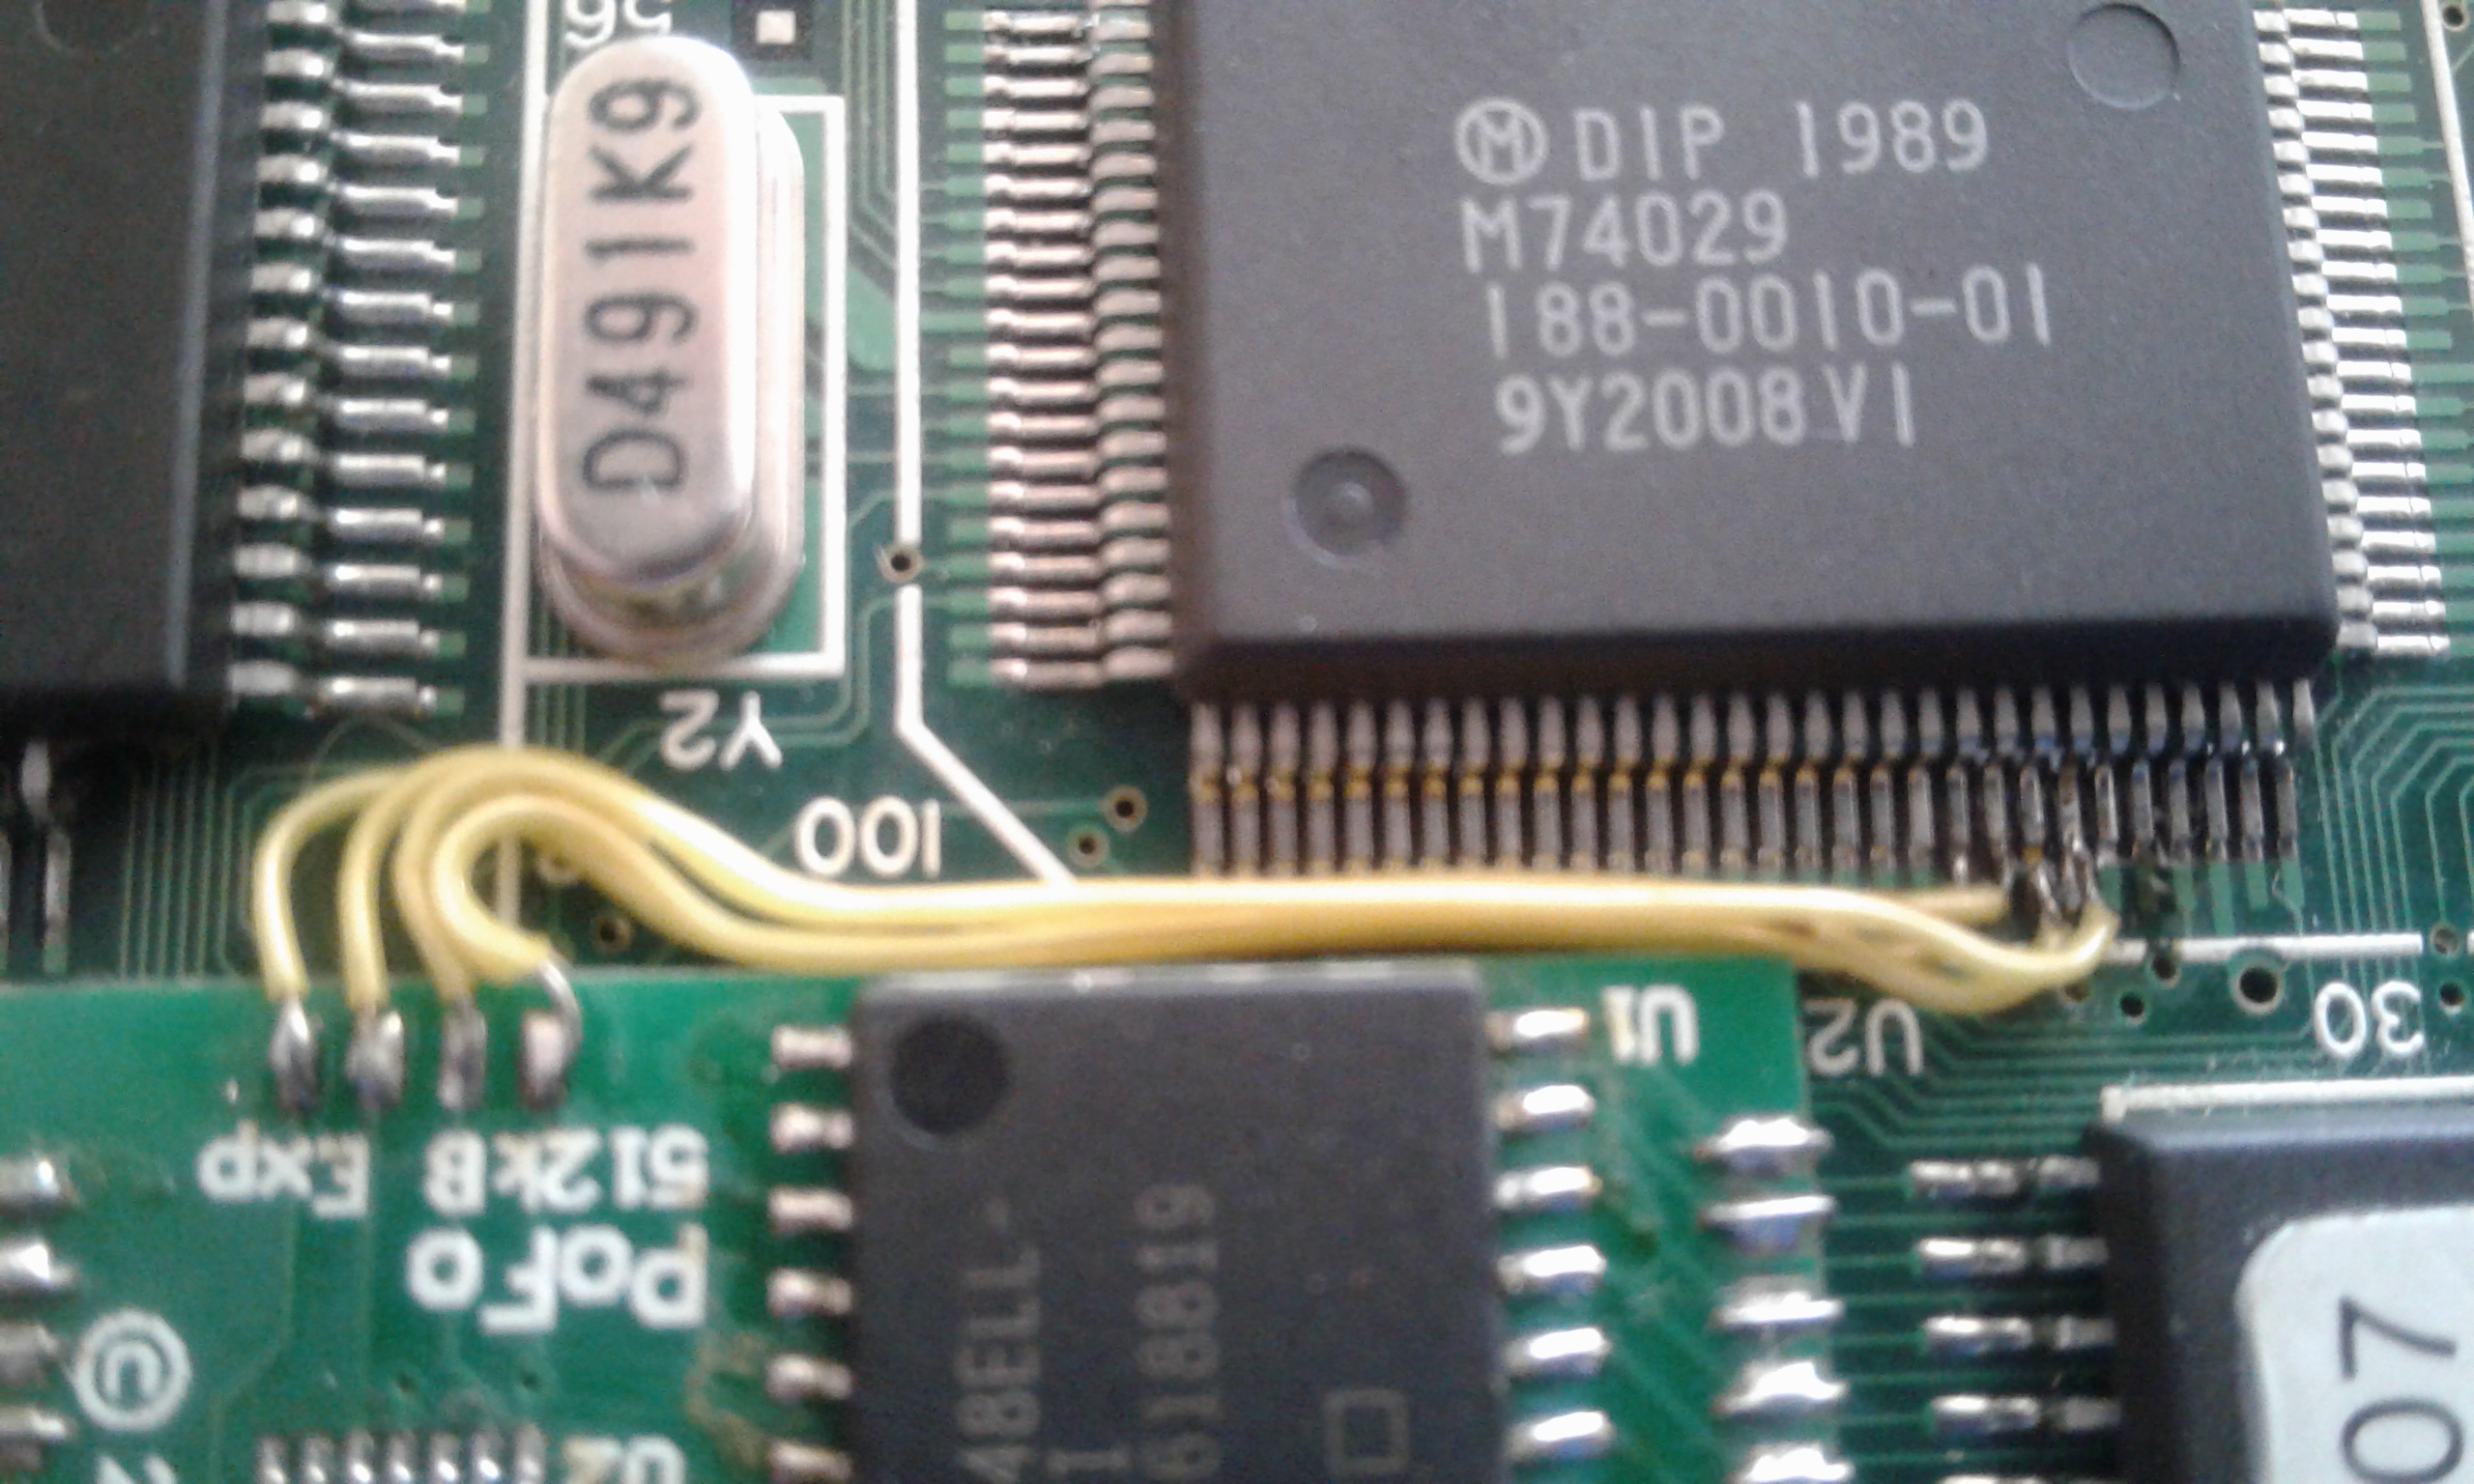
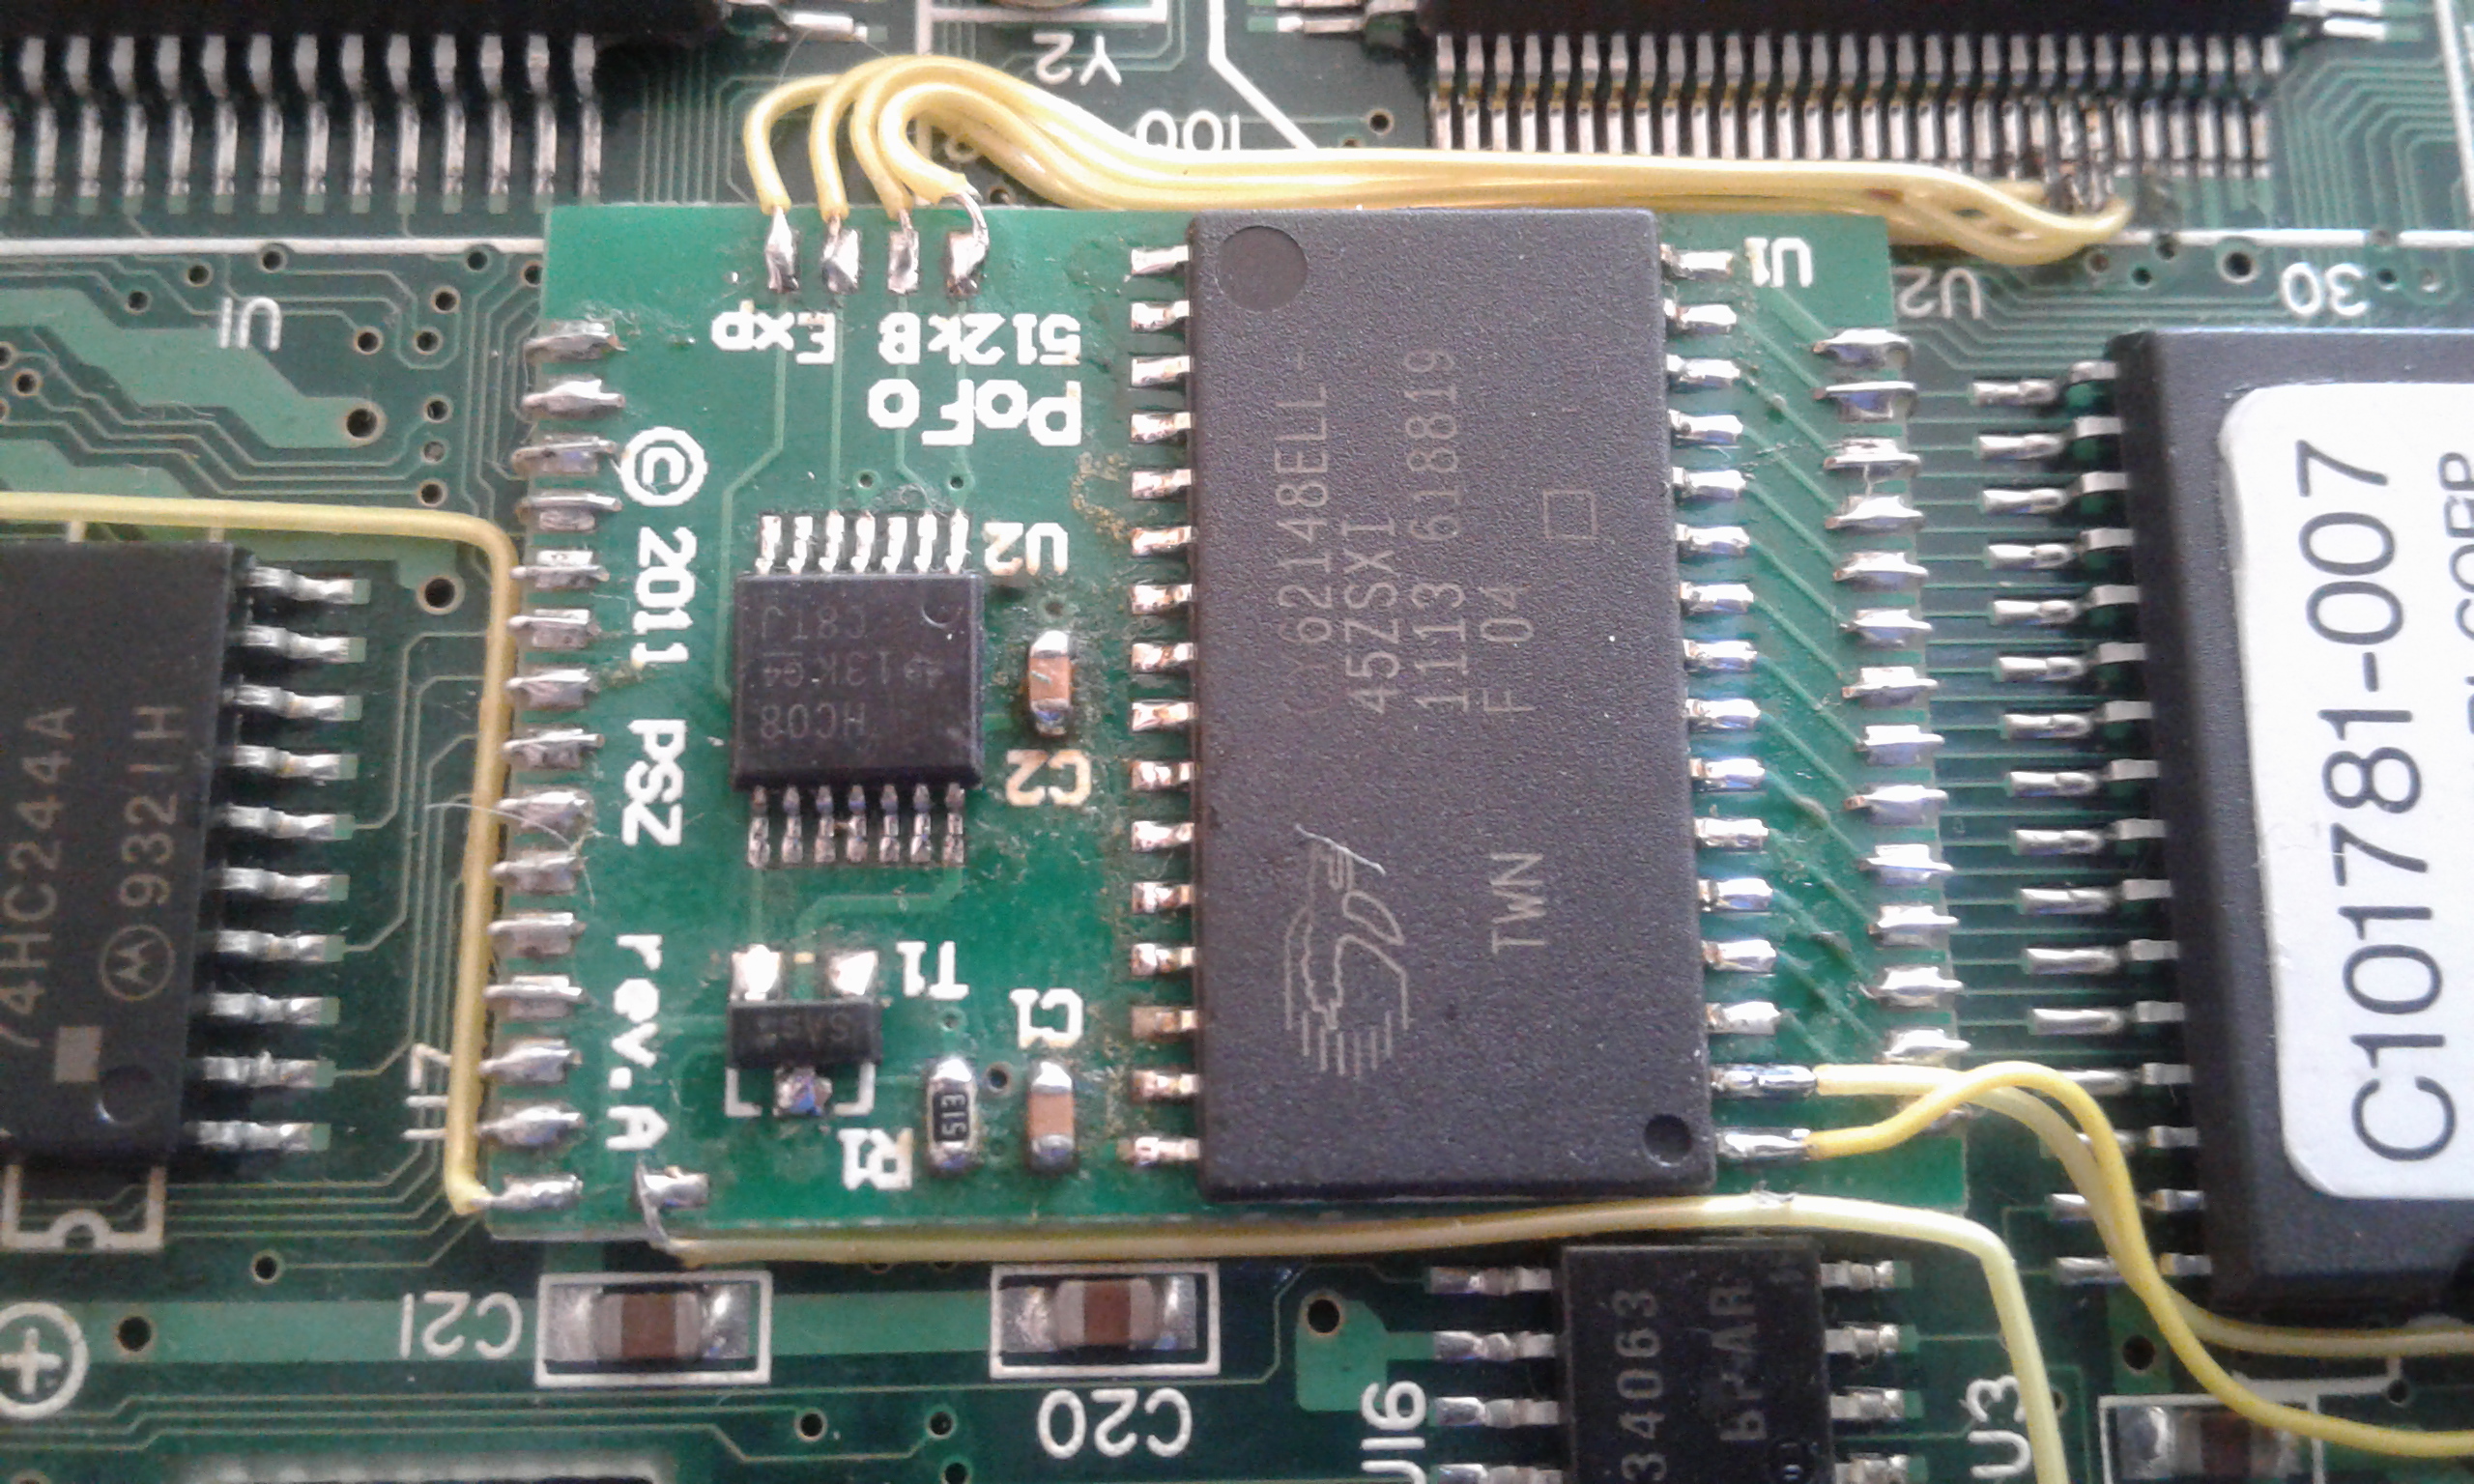
The original RAM (U5-U8) has been removed. The board is one-sided; the numbers on the two chips are as follows:
CY62148ELL-
45ZSXI
1113 618819
F04
HC08
13KG4
C8TJ
It's been a long time since I wrote here. SillyVenture 2k11 is over and I was there, but had no time to write even a short report. Today I promised myself to write a post, that has been waiting in a queue for long.
RAM expansion. The must-have mod if you want to use something else than the built-in software on your Portfolio.
Already in the 1989 128k was too little. With 4 kilobytes taken by display RAM, at least 8 KB used as ramdisk and some memory used by system (depending on FILES and BUFFERS settings in CONFIG.SYS), less than 100k was available for the program. With 40-kb ramdisk (absolute minimum when you wanted to upload some software) you were left with no more than 60 kilobytes. RAM expansions appeared soon after Portfolio, the first ones being large, uncomfortable interfaces mounted to the expansion bus. Early mods built in the Portfolio were two times the price of the computer. As years were passing by, more and more sophisticated solutions were emerging for affordable prices - both commercial and fan-made.
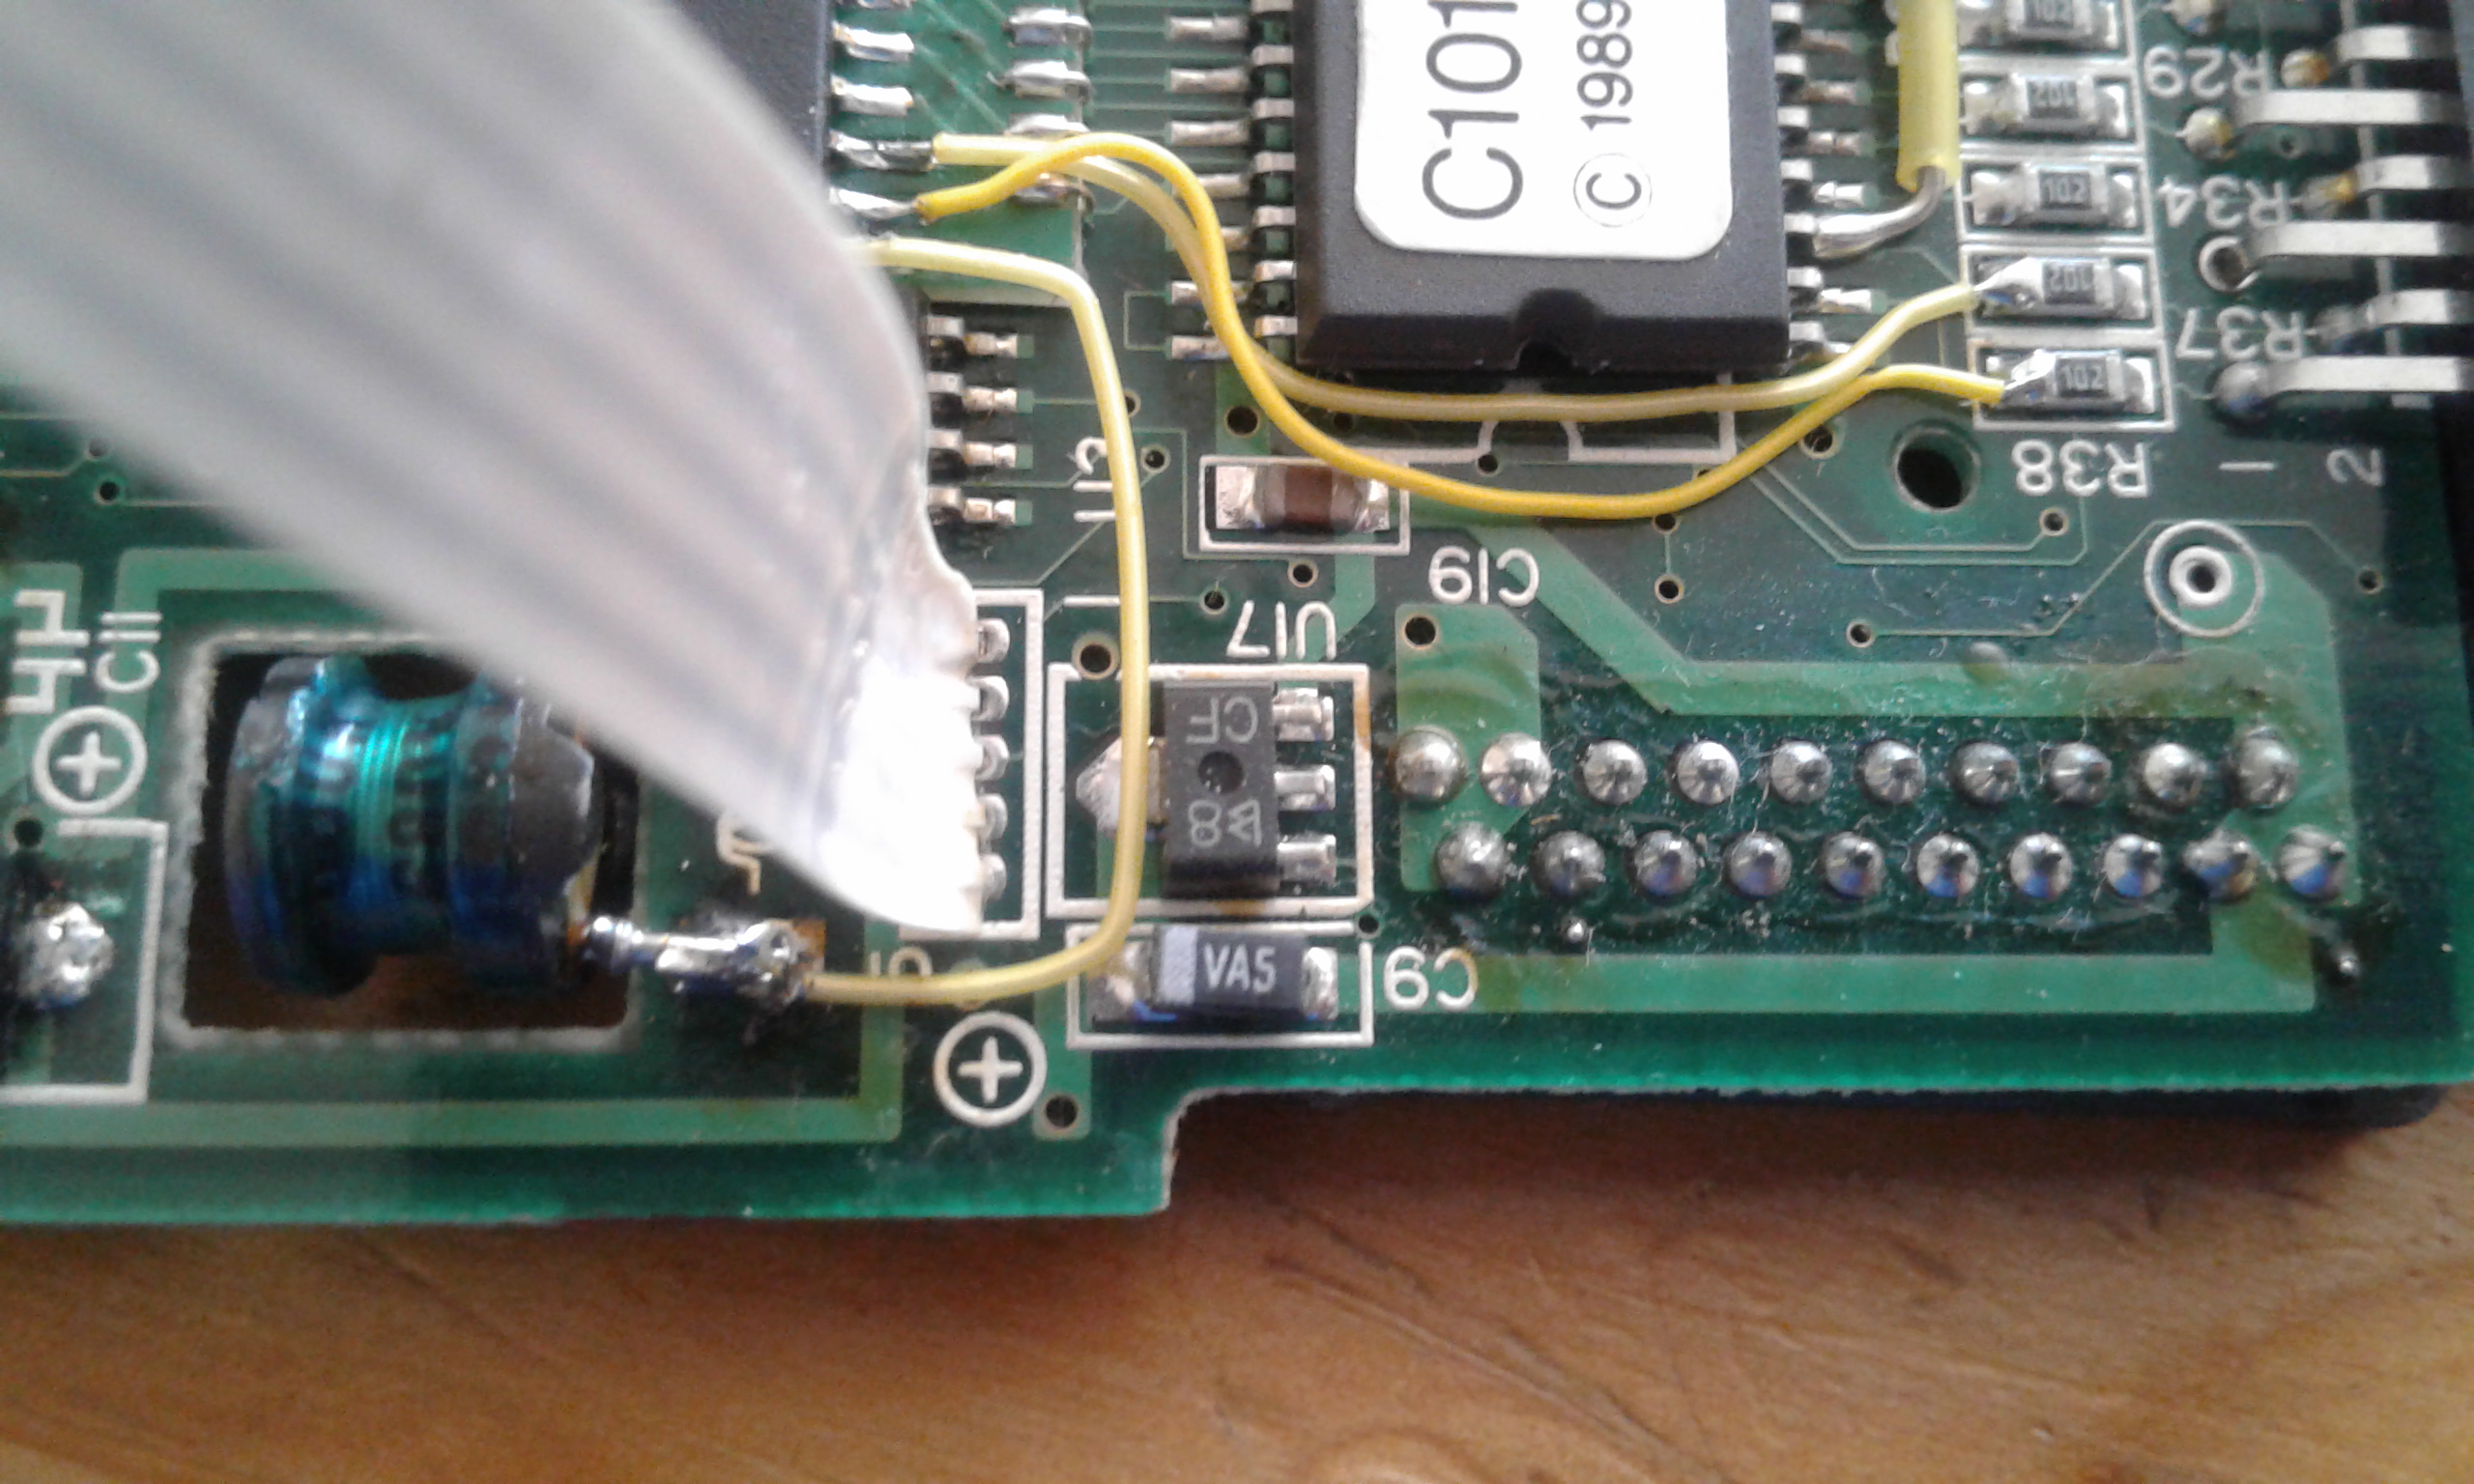
In the 2000s, with the twilight of Atari Portfolio, RAM expansions have become extremely hard - if not impossible - to acquire. This makes the computer virtually useless for any applications but using the built-in software, especially for coding. It was clear for Maestr0 - a talented constructor who decided to create a new 512 KB built-in RAM expansion for Atari Portfolio.

Apart from expanding my Pofo's RAM, Maestr0 replaced the capacitors, making my computer run 10 minutes without batteries!
Maestr0's construction includes a small PCB mounted on the Portfolio's mainboard. It's intended to be as cheap as possible and easy to assemble. When the author decides to release it, I'll inform you about pricing, shipping conditions and how to purchase.
Besser vorbeugen als heilen
I remember this German saying from school. It means "better to prevent than cure" and when it comes to vintage computers, this is painfully true. I'm really thrilled by the possibility, that one of my palmtops may get broken and never get back on its feet. So when I had read in PofoWiki, that every 7 of 10 Portfolio failures are associated with the display ribbon cable, I began to fear opening and closing it. I was wondering, what would be a worse disaster: losing the display and therefore making my Portfolio out of action when the ribbon would break, or breaking it myself during preventive "operation". Hopefully, the abovementioned article said that the modification is really harmless and easy to perform.

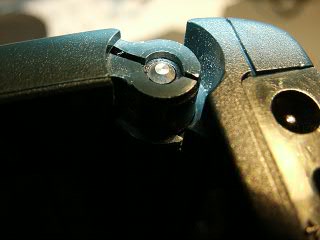
Having read the instruction, I carefully removed the plastic bolt from the rear. Now all I needed to do was to cut both edges of the bolt so that the ribbon wouldn't be held tight. I used the only tools I had at the moment - a cheap Chinese cutter and the pincers to rip the edges off. After the treatment the bolt looked like this:

I finished the edges with a fine file. I noticed that the gap is still too narrow, so I widened it with the file. It's crucial that the gap is wide enough to not touch the ribbon. The effect of my work may be seen below:

I know that the modification disfigures Portfolio in a way. If you're a devoted collector, you'll probably let go. But if you're using your Pofo intensively and the functionality means more to you than the look, read these articles (first, second - both in German, but the second one is filled with good quality photos) and consider doing it.