The incomplete Atari Portfolio disassembly guide
I don't want to be mean, but you better print this post and keep it by your Portfolio together with a small screwdriver - you know, just in case 😉 It covers only the keyboard part of the case - maybe someday (I hope not) I'll write about dismantling the display.
First, obviously, prepare that small screwdriver I mentioned before and a place where the screws will be safe (a small plate will do the job). And here we go.
Peel off the rubber feet from the back side of the case. Underneath you'll find two black screws:
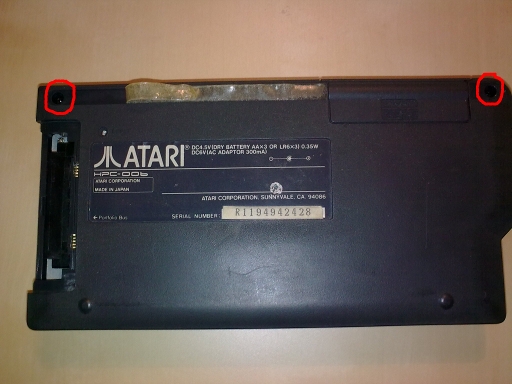
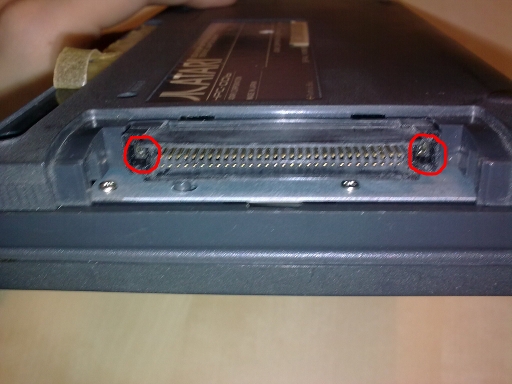
Unscrew them. To open the case you'll also need to unscrew the two remaining black screws, located on the expansion slot:
That's it. You may carefully open the case and watch the guts:
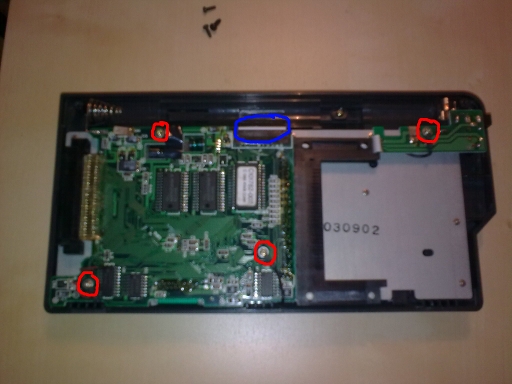
Unscrew the four silver screws (marked red), then detach the display tape (marked blue) - you need to open the brown connector, uncoupling its mobile part with the screwdriver.
The main board is still attached to the keyboard with the green keyboard ribbon cable:
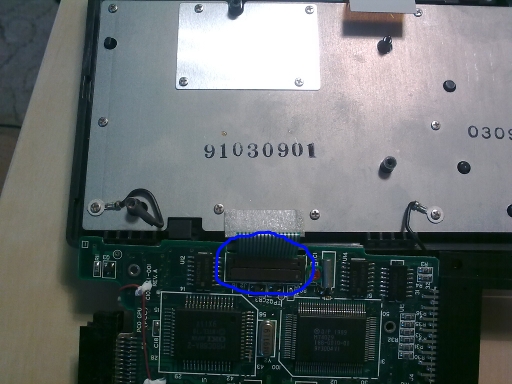
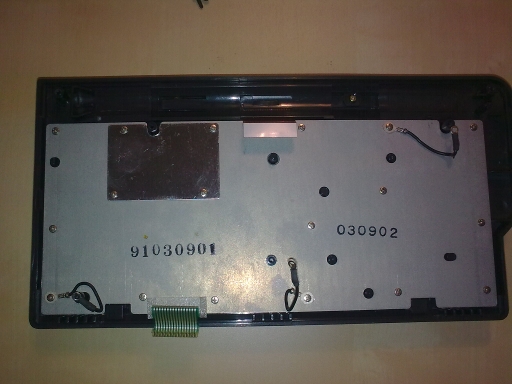
Detach it and put the board aside. Unscrew all the silver screws from the metal shield (also those holding the three black cables and the metal plate):
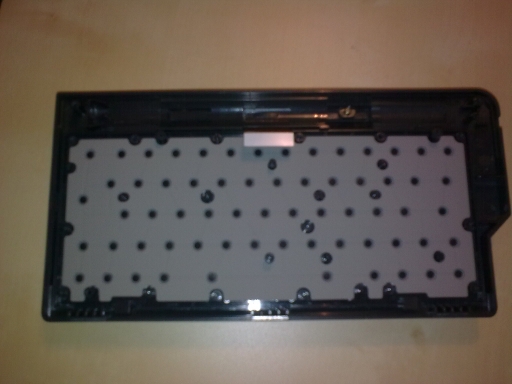
Now remove the shield (it has a keyboard foil underneath) and you get access to the rubber...
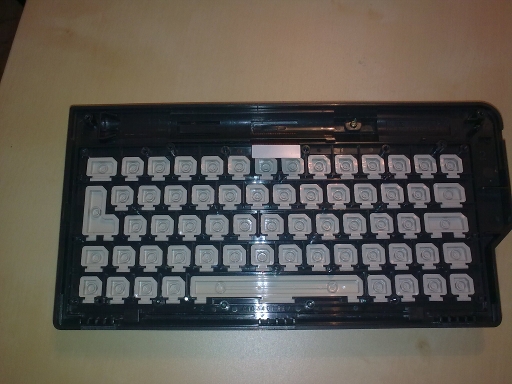
...and the keys:
Good luck!