I don’t want to be mean, but you better print this post and keep it by your Portfolio together with a small screwdriver – you know, just in case 😉 It covers only the keyboard part of the case – maybe someday (I hope not) I’ll write about dismantling the display.
First, obviously, prepare that small screwdriver I mentioned before and a place where the screws will be safe (a small plate will do the job). And here we go.
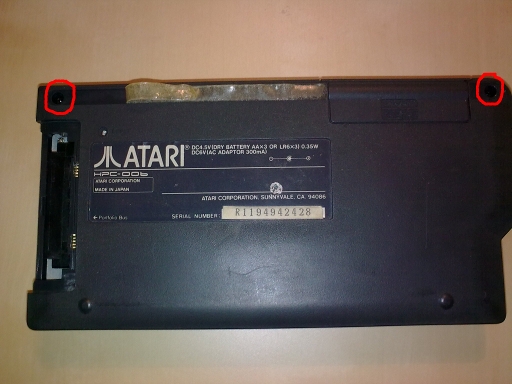
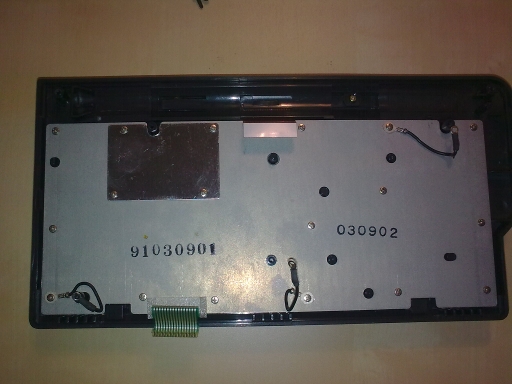
Peel off the rubber feet from the back side of the case. Underneath you’ll find two black screws:
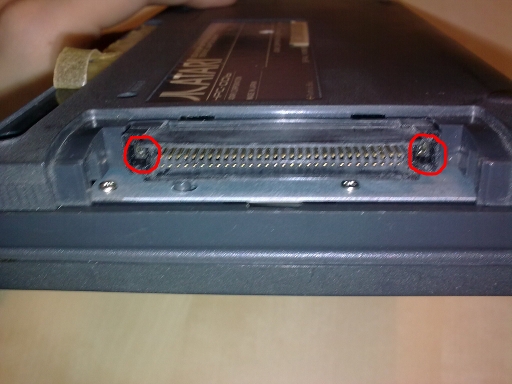
Unscrew them. To open the case you’ll also need to unscrew the two remaining black screws, located on the expansion slot:
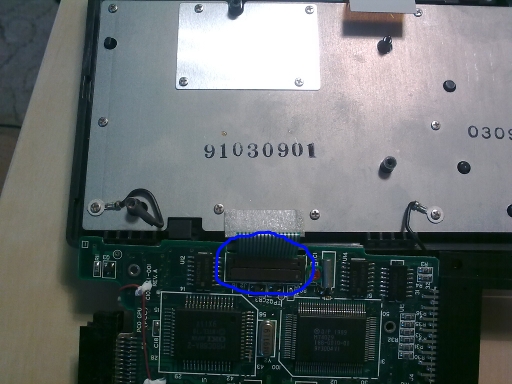
That’s it. You may carefully open the case and watch the guts:
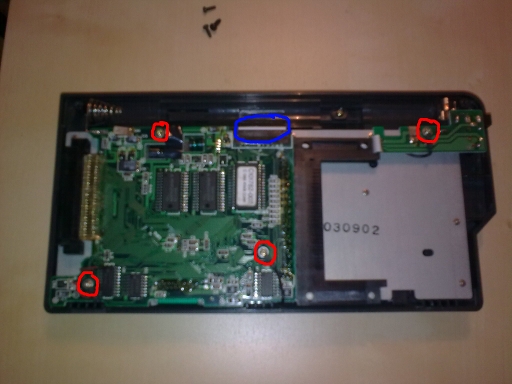
Unscrew the four silver screws (marked red), then detach the display tape (marked blue) – you need to open the brown connector, uncoupling its mobile part with the screwdriver.
The main board is still attached to the keyboard with the green keyboard ribbon cable:
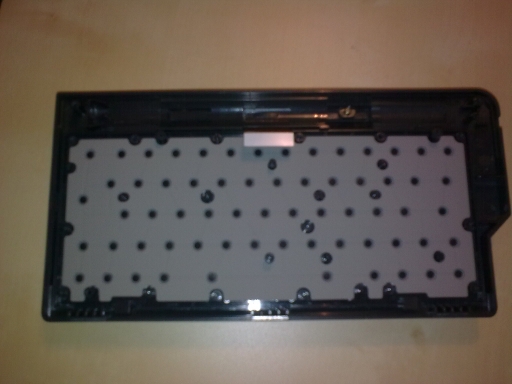
Detach it and put the board aside. Unscrew all the silver screws from the metal shield (also those holding the three black cables and the metal plate):
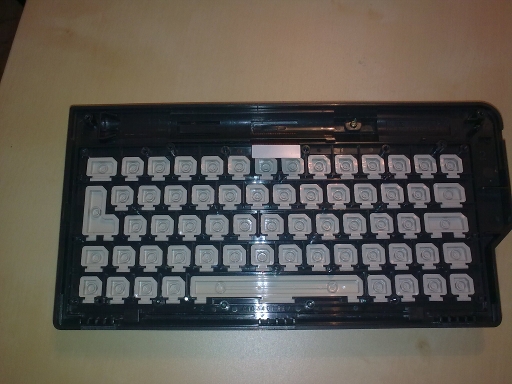
Now remove the shield (it has a keyboard foil underneath) and you get access to the rubber…
…and the keys:
Good luck!
I found this very helpful for working out what was wrong with mine. Turns out it was just dirty contacts…
This instructable is very helpful.
But now my Atari is in trouble: hinge system needs some repair.
Any suggestions on how to disassemble the display part?
AFAIK, what you need to do is remove the plastic cover of the screen (don’t worry, you’ll easily stick it back afterwards). I’m almost sure that you’ll find some screws underneath (but you have to check it on your own – at least until I write the second part of this guide 😉 ).
You’ll find two black screws along the hinge edge. You then have to use a small flat screwdriver to ease the case apart. I always start at one of the hinge corners, and then carefully work my way around.
Thank you so much! You’re a lifesaver! 🙂
For some reason (too thick?) I had a brand new PenLite battery that wouldn’t come out. Thanks to your instructions I found the right screw and that widened the battery compartment enough for the AA to slide out.
You’re welcome! Hope your Portfolio will serve well 🙂
Is it a common problem to have to disassemble your pofo in order to change the batteries? One of mine gets stuck. I tried to tape over the gap but it didn’t help…
Huh, I’ve never heard of it.. This may sound stupid, but maybe you could try to find where your battery gets stuck and widen that fragment with a sandpaper?
Edit: I just saw that it’s exactly what Evert wrote 😉
I can’t really, but I can’t explain adequately without a photograph of the inside and I don’t want to have to take it apart yet again…
If someone knows if or where the remainder part of this guide is located that would wonderful! I am half tempted to adventure it on my own and record the process and make a guide myself. Thanks!
not sure if it is written yet…
btw, i replaced german keyboard with US one just today – thanks to this article…
That’s good to hear!
Pingback: Complete Atari Portfolio disassembling and repairing | Consulting Daylights